
✨ This article was AI edited. Editorial responsibility: TopElectricShavers.net.
Produced with AI. This article was artificially generated. Editorial responsibility: TopElectricShavers.net.
A Wahl beard trimmer rebuild is the complete physical teardown, mechanical servicing, and electrical restoration of a cordless Wahl trimmer chassis—including replacing depleted Ni-MH or Li-ion battery cells, desoldering degraded switches, degreasing internal eccentric drive cams, and reseating cutting heads. Rather than discarding a trimmer when battery runtime degrades or the motor bogs down under load, rebuilding the internal sub-assemblies restores factory-fresh cutting torque and extends grooming tool longevity by 5 to 10 years.
Cordless Wahl beard trimmers—from the classic Groomsman and Stainless Steel Lithium Ion+ (models 9818, 9864, and 9888) to the Peanut and Aqua Blade—are among the most popular grooming tools globally. Despite their durable metal and composite outer casings, everyday exposure to bathroom humidity, hair clippings, and repeated charge cycles inevitably degrades their internal components over time.
Many users turn to YouTube teardown videos to diagnose why their trimmer won’t hold a charge, vibrates feebly, or makes a high-pitched grinding sound. However, concise, step-by-step technical blueprints that document part specifications, battery chemistries, soldering parameters, and safety cautions are often missing. This comprehensive guide provides an authoritative workshop manual for rebuilding your Wahl beard trimmer from bare casing to precision performance.
Contents
Trimmer Diagnosis: Identifying What Needs Rebuilding
Before disassembling your trimmer, pinpoint the specific mechanical or electrical failure:
| Observed Symptom | Probable Root Cause | Component to Rebuild / Replace | Skill Level Required |
|---|---|---|---|
| Charges fully but dies within 2 minutes | Battery capacity degraded (high internal chemical resistance). | Replace internal 14500 Li-ion or AA Ni-MH cell with solder tabs. | Intermediate (Soldering) |
| Motor hums weakly or stalls on dense hair | Hair packed around drive eccentric shaft; oxidized motor brushes. | Clean motor output shaft, apply dielectric lube, replace rotary cam. | Beginner to Intermediate |
| Intermittent power; wiggling switch turns it off | Micro-switch contacts oxidized or fatigued leaf spring. | Clean switch contacts with contact cleaner or solder new micro-switch. | Intermediate |
| Trimmer does not turn on; charger LED stays off | Blown thermal fuse, damaged charging port, or severed PCB trace. | Multi-meter continuity test; replace DC barrel jack or fuse diode. | Advanced |
| Loud rattling / violent buzzing without cutting | Worn plastic drive tip or unseated blade cassette spring. | Replace drive nylon cam eccentric assembly; oil blade set. | Beginner |
Tools, Safety Gear, and Replacement Parts Checklist
- Disassembly Tools: Torx T6 and T8 screwdrivers, #00 Phillips precision driver, plastic spudger or guitar pick prying tool.
- Electronics Equipment: 30W–60W temperature-controlled soldering iron, rosin-core lead-free 60/40 solder, desoldering braid / solder sucker, digital multimeter.
- Chemicals & Lubricants: 99% Isopropyl alcohol, DeoxIT electronic contact cleaner, high-speed synthetic clipper oil, food-grade silicone grease (for drive cams).
- Replacement Parts: Tabbed rechargeable cell (14500 Li-ion 3.7V for Lithium models, or AA Ni-MH 1.2V 2000mAh for older Groomsman models). Ensure you buy tabbed cells; standard button-top batteries cannot be soldered safely!
Step-by-Step Wahl Beard Trimmer Teardown & Rebuild
Step 1: Blade Cassette Removal and Outer Shell Disassembly
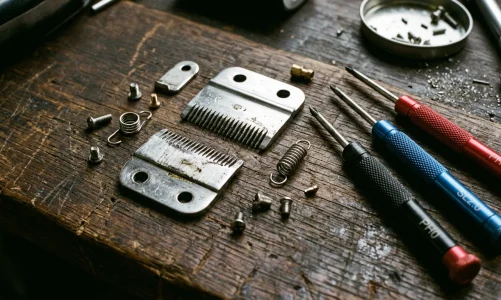
Begin by popping off the detachable blade assembly. On most modern Wahl trimmers, press firmly forward on the top teeth with both thumbs; the cassette will hinge and unclip from the chassis. Inspect the metal hinge clip on the body for trapped hair clumps and blow it clean.
Inspect the bottom housing. Most Wahl trimmers hide two Torx (T6 or T8) or small Phillips screws beneath rubber foot pads or inside the bottom charging port recess. Remove these screws and place them into a magnetic parts dish. Use a plastic spudger to gently release the snap-fit seams along the ergonomic side grips, separating the upper faceplate from the chassis tray.
Step 2: Inspecting and Extracting the Printed Circuit Board (PCB)
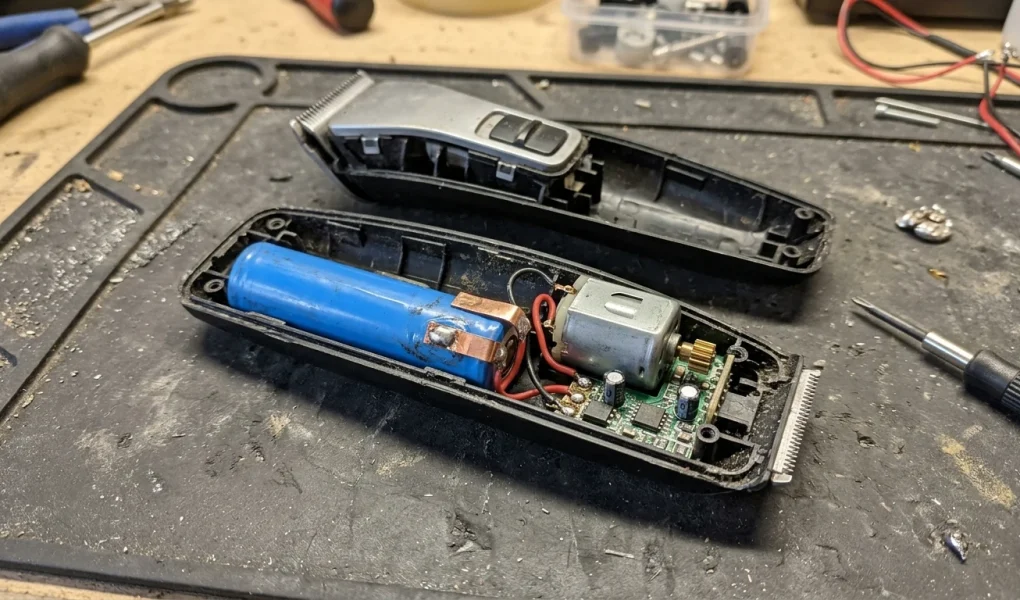
Once the casing splits open, observe the internal layout. You will see a compact circuit board, the miniature high-torque DC motor, and the rechargeable battery cell nested in silicone vibration isolators.
- Unscrew any secondary retaining screws holding the PCB to the internal chassis.
- Carefully lift the motor and battery cradle out of the casing simultaneously to avoid tearing delicate lead wires.
- Note the exact polarity (+ and -) of the battery contacts and the motor terminals before proceeding. Taking a quick smartphone photo provides an invaluable wiring reference.
Step 3: Battery Desoldering and Cell Replacement
In 90% of trimmer rebuilds, dead battery cells are the primary culprit. Factory Wahl cells feature nickel solder tabs spot-welded to the PCB terminals:
- Heat your soldering iron to approximately 350°C (660°F). Apply fresh solder to the tip to facilitate thermal transfer.
- Apply desoldering braid to the positive and negative solder pads on the PCB to wick away the molten solder, gently teasing the nickel tab free with tweezers.
- Take your fresh replacement tabbed battery (matching original chemistry: 3.7V Li-ion or 1.2V Ni-MH). Trim the tabs to length.
- Bend the tabs to match the through-holes on the board, verify correct polarity, and solder firmly in place. Create shiny, convex solder joints without bridging nearby surface-mount components.
Step 4: Motor Maintenance and Drive Cam Inspection
The small white plastic tip mounted on the motor spindle is the eccentric drive cam. As the motor spins, this cam moves laterally inside the blade runner to oscillate the cutting teeth:
- Pull the plastic drive cam off the motor shaft. Check for cracks or rounded edges. If worn, replace it with a genuine Wahl drive block replacement.
- Check the motor shaft for hair wrapped tightly behind the brass collar. Use a precision hobby knife to slice and extract bound hair coils that drag down motor RPM.
- Apply a single drop of electrical contact cleaner into the motor brush vent ports, followed by a pinhead drop of synthetic oil on the front brass bushing.
Step 5: Switch Cleaning and Reassembly
Spray the mechanical slide switch or micro-pushbutton with DeoxIT electronic contact cleaner and toggle the mechanism 20 times to clear carbon oxidation. Re-seat the motor and battery assembly into the lower shell, ensuring rubber vibration dampening boots are correctly aligned.
Snap the upper casing back onto the lower shell, listening for crisp perimeter latch clicks. Reinstall the bottom Torx/Phillips casing screws. Re-attach the blade cassette and test the power switch. The motor should spin up with an immediate, high-torque roar.
Preventative Maintenance to Avoid Future Teardowns
- Bi-Weekly Oiling: Always lubricate cutting blades with 3 drops of clipper oil after every 2 to 3 grooming sessions. Dry blades create immense mechanical resistance that overheats the motor and drains battery runtime 40% faster.
- Avoid Complete Depletion: If your trimmer utilizes modern Lithium-ion batteries, do not run it until it completely stops. Recharge when you notice the motor tone dropping slightly to maximize charge cycle life.
- Moisture Protection: Unless your model is explicitly rated IPX7 waterproof (like the Aqua Blade), never submerge the trimmer handle in water or store it inside a steamy shower cubicle.
Frequently Asked Questions
Can I replace a Ni-MH battery in an older Wahl trimmer with a Lithium-ion cell?
No. Ni-MH cells operate at 1.2V nominal, whereas Li-ion cells operate at 3.7V. Furthermore, their charging algorithms are completely incompatible. Installing a 3.7V Lithium-ion cell into a 1.2V Ni-MH circuit will instantly fry the motor and create a severe thermal runaway and fire hazard.
Where can I purchase genuine replacement parts for Wahl trimmers?
Authorized barber supply wholesalers, specialty razor repair outlets, and reputable electronics component retailers carry genuine Wahl replacement parts, including replacement blade cassettes, plastic drive cams, and solder-tabbed battery cells.
Why does my Wahl trimmer pull hair even after installing a new battery?
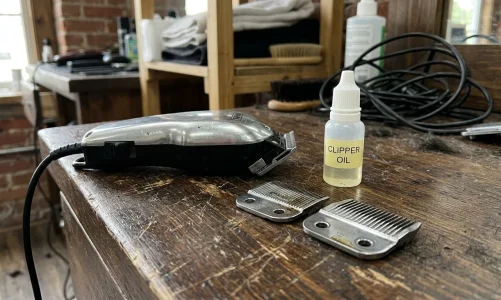
If the motor has full battery power but still pulls or snags hair, the blade cassette itself is either dull, clogged with compacted hair between the comb and cutter, or lacks lubrication. Disassemble and clean the blade teeth, and apply 3 drops of clipper oil.
Get our latest guides, news, and insights highlighted in your Google Search & AI Overviews.
 THE 60-DAY HAIR CHALLENGE